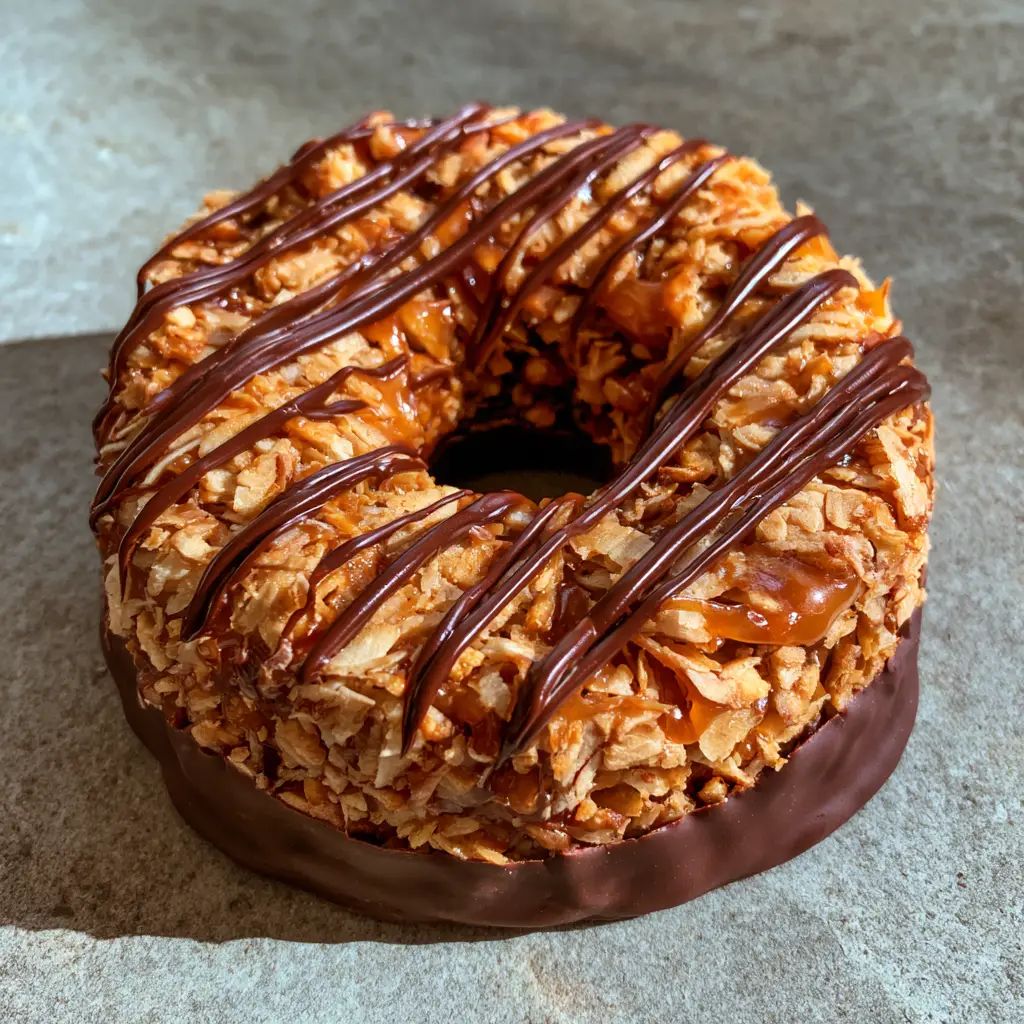
No-Bake Samoa Cookies are the holy grail of homemade treats, combining the nostalgic flavors of toasted coconut, gooey caramel, and rich dark chocolate without ever turning on the oven. If you have been searching for a way to enjoy that iconic ring-shaped cookie year-round, this recipe is your golden ticket. The textures are a perfect recreation of the classic, featuring a crisp, toasted coconut body bound by a thick, amber caramel and finished with a smooth chocolate base.
Making these No-Bake Samoa Cookies at home allows you to control the quality of the ingredients, ensuring every bite is packed with authentic flavor. Whether you call them Samoas or Caramel deLites, there is no denying that the combination of salty-sweet caramel and dark chocolate is a culinary masterpiece. This version stays true to the visual blueprint of the original, right down to the precise diagonal chocolate drizzles.
Why These Easy Caramel Coconut Rings Will Be Your New Obsession
- Textural Perfection: The contrast between the highly textured, golden-brown toasted coconut and the thick, sticky amber caramel creates a chew that is identical to the bakery version.
- No-Bake Convenience: Skip the dough chilling and the hot oven; these cookies set up beautifully at room temperature or in the fridge.
- Gourmet Visuals: With a smooth, thick layer of dark chocolate on the bottom and thin diagonal stripes on top, they look like they came from a high-end chocolatier.
- Dietary Control: Because you are making these from scratch, you can easily swap for high-quality dark chocolate or even dairy-free caramel.
If you are a fan of decadent, fruit-filled treats, you might also want to try these strawberry cheesecake cookies for your next dessert spread.
Essential Ingredients for the Perfect Samoa Recreation
To achieve the specific look and taste of professional No-Bake Samoa Cookies, the quality of your ingredients matters. Each component serves a scientific purpose in the structural integrity of the cookie.
Sweetened Shredded Coconut: 3 cups (approx. 225g). This provides the bulk of the cookie. We will toast this to a deep golden brown to ensure maximum crunch and a nutty aroma that balances the sugar.
Soft Chewy Caramels: 11 ounces (310g). Using high-quality caramels ensures a thick amber caramel consistency that holds the coconut together without becoming rock-hard or too runny.
Heavy Cream: 2 tablespoons (30ml). This is the secret to thinning the caramel just enough to make it pliable while maintaining that “sticky” quality required for the ring shape.
Dark Chocolate Melting Wafers: 10 ounces (280g). Dark chocolate provides a sophisticated bitterness that cuts through the sweet caramel. The wafers melt more smoothly than chips, creating that glossy dark chocolate finish.
Sea Salt: 1/2 teaspoon (3g). Never skip the salt! It heightens the caramel notes and makes the chocolate flavors “pop” against the toasted coconut.
For a savory meal before you dive into these sweets, consider a comforting bowl of chicken enchilada soup to balance the sweetness of your day.
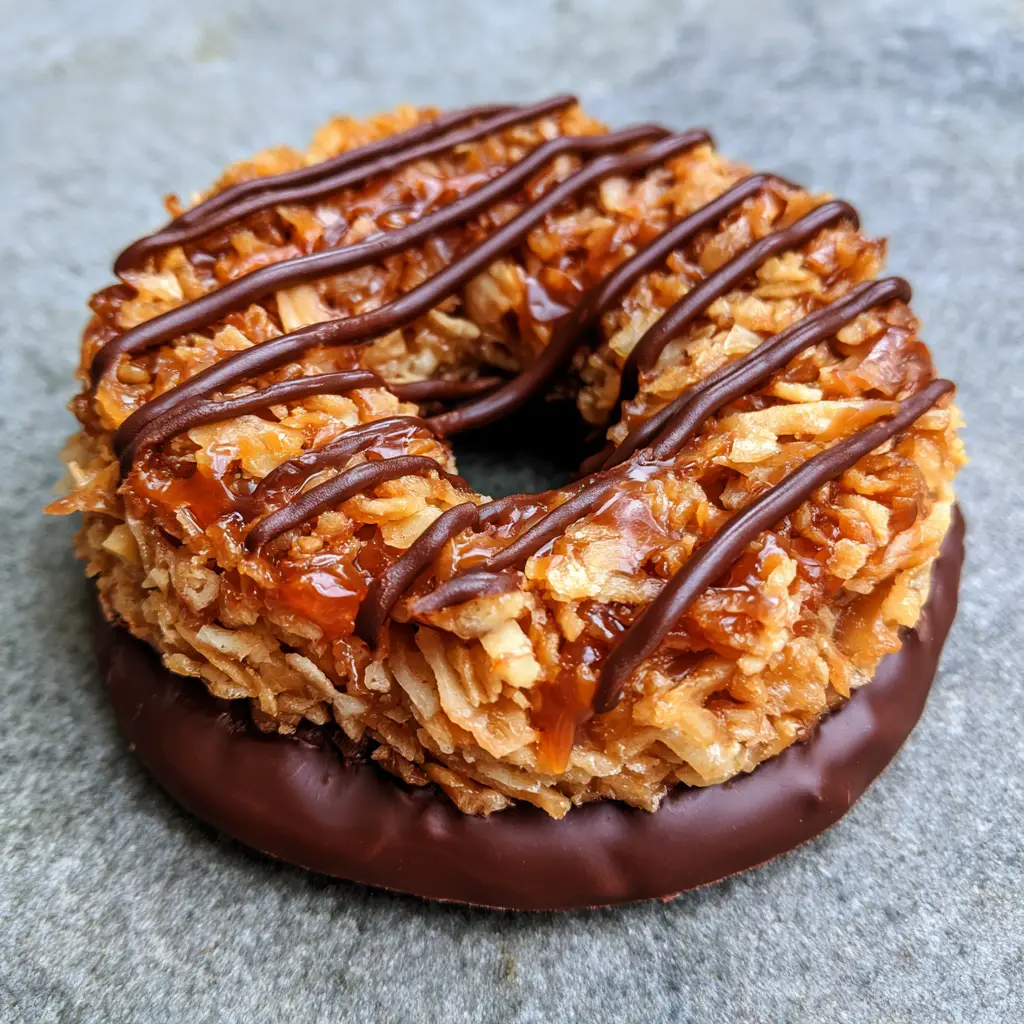
Mastering the Golden Toast: The Coconut Foundation
The first step in creating No-Bake Samoa Cookies is to transform raw coconut into the golden-brown toasted coconut flakes seen in the visual blueprint. This isn’t just for color; toasting changes the molecular structure of the coconut, releasing oils that provide a richer mouthfeel.
Spread your 3 cups (225g) of coconut on a large baking sheet. Even though this is a “no-bake” recipe, we use the oven briefly (or a large skillet) just for the coconut. Toast at 325°F (165°C) for 5-8 minutes, tossing every 2 minutes. Visual Cue: You are looking for a deep amber hue, not just pale yellow. The smell should be intensely nutty.
Once toasted, move the coconut to a large glass mixing bowl immediately to stop the cooking process. If you leave it on the hot pan, the residual heat will burn the delicate flakes.
Creating the Sticky Amber Caramel Binder
In a microwave-safe bowl or a small heavy-bottomed saucepan, combine the 11 ounces (310g) of caramels with the 2 tablespoons (30ml) of heavy cream and a pinch of salt. Melt the mixture on low heat, stirring constantly.
Sensory Cue: The caramel should be smooth, thick, and a vibrant amber color. It should coat the back of a spoon heavily. If it feels too thin, let it cool for three minutes before mixing with the coconut.
Pour the warm caramel over the toasted coconut. Use a sturdy spatula to fold the two together until every single flake of coconut is glistening and bound by the caramel. This is the “glue” that ensures your No-Bake Samoa Cookies don’t crumble when you bite into them.
The Art of the Ring-Shaped Cookie Assembly
To get that distinct circular hole in the center, you need to work while the mixture is still warm and pliable. Line a flat surface (like a gray stone countertop or a baking sheet) with parchment paper.
Scoop about 2 tablespoons of the coconut mixture and roll it into a ball. Flatten it slightly into a disc. Using the end of a wooden spoon or even your thumb, press a hole into the center. Visual Cue: Gently widen the hole to ensure it stays open as the caramel sets. The cookie should be a ring-shaped assembly about 2.5 inches (6cm) in diameter.
Repeat this process until all the mixture is used. If the caramel starts to harden and become difficult to shape, simply pop the bowl back in the microwave for 10 seconds to loosen it up.
While these set, you might be thinking about dinner. A quick creamy garlic parmesan orzo makes an excellent side dish for a busy weeknight.
The Finishing Touches: Dark Chocolate Base and Drizzles
Once your coconut rings have cooled and firmed up (about 20 minutes in the fridge), it is time for the chocolate work. Melt your dark chocolate in a shallow bowl until it is smooth and glossy.
Pick up a coconut ring and dip the bottom directly into the chocolate. Lift it out and let the excess drip off, then place it back on the parchment paper. This creates the smooth, thick layer of dark chocolate on the bottom that characterizes a true Samoa.
For the iconic stripes, transfer the remaining melted chocolate into a small piping bag or a sandwich bag with the corner snipped off. Apply thin, precise diagonal drizzles across the top of each cookie. Visual Cue: Move your hand in a swift, steady motion to get clean lines rather than globs.
Expert Tips for Success
- Keep it Cool: If your kitchen is warm, the caramel may stay too soft. Pop the cookies into the freezer for 10 minutes before dipping them in chocolate to ensure they hold their shape.
- Avoid the Microwave Burn: When melting chocolate or caramel, always use 20-second bursts and stir in between. Chocolate can seize instantly if overheated.
- Parchment is Key: Never place these directly on a plate or stone surface while the chocolate is wet, or they will stick permanently. Always use parchment or a silicone mat.
- Salt Balance: If you use salted butter caramels, omit the extra sea salt in the recipe to avoid an overly salty finish.
Storage, Reheating & Freezing
Storage: These No-Bake Samoa Cookies should be stored in an airtight container. They stay fresh at room temperature for up to 5 days, but they are best kept in the refrigerator for a snappier chocolate texture.
Freezing: These cookies freeze exceptionally well! Place them in a single layer on a tray to freeze solid, then transfer to a freezer-safe bag. They will last up to 3 months. Enjoy them straight from the freezer for a chilly, chewy treat!
What to Serve With This
These cookies are incredibly rich, so they pair best with beverages that can cut through the sweetness. A cold glass of milk is the classic choice, but a bitter espresso or a dark roast coffee highlights the dark chocolate beautifully.
If you’re hosting a party, serve these alongside other handheld favorites like apple pie egg rolls for a fun, themed dessert board. For a savory contrast, a spread of sourdough discard flatbread with savory dips works wonders.
Frequently Asked Questions
Yes! Use coconut-based caramel (like Cocomels) or a homemade vegan caramel sauce, and ensure your dark chocolate is dairy-free.
You can, but since the original Samoas are quite sweet, you may want to add a tablespoon of maple syrup or honey to the caramel mixture to balance the flavor.
Toasting the coconut is essential for the authentic Samoa flavor and the golden-brown color described in the visual blueprint; untoasted coconut will be too soft and pale.
Roll the mixture into a ball, flatten it, and then use the end of a wooden spoon or your finger to press a hole through the center, gently shaping it into a ring.
The caramel may have cooled too much. Briefly reheat the caramel and cream mixture until it is hot and liquid before folding in the coconut.
The Best Homemade No-Bake Samoa Cookies
No-Bake Samoa Cookies: The Ultimate Copycat Girl Scout Treat
Ingredients
Equipment
Method
- Toast shredded coconut in a skillet or oven at 325°F (165°C) until golden brown and aromatic, about 5-8 minutes.
- Melt caramels with heavy cream and salt in a microwave-safe bowl in 30-second increments until smooth.
- Fold toasted coconut into the caramel. Form into rings with a hole in the center while the mixture is still warm.
- Dip the bottom of each cooled cookie into melted dark chocolate and place on parchment paper.
- Drizzle remaining dark chocolate in diagonal lines across the top of the cookies.
Notes
Store in the fridge to keep the chocolate snappy and the caramel chewy.
Save This Recipe to Pinterest!
Do you love the taste of Girl Scout cookies but hate waiting for cookie season? Make sure to save this recipe to your Dessert Board on Pinterest! Follow zoe_chef_Official for more decadent, easy-to-follow recipes that look just as good as they taste.
If you make these No-Bake Samoa Cookies, please come back and leave a 5-star rating and a comment below. I love seeing your photos—feel free to share your chocolate-drizzled masterpieces with the community!