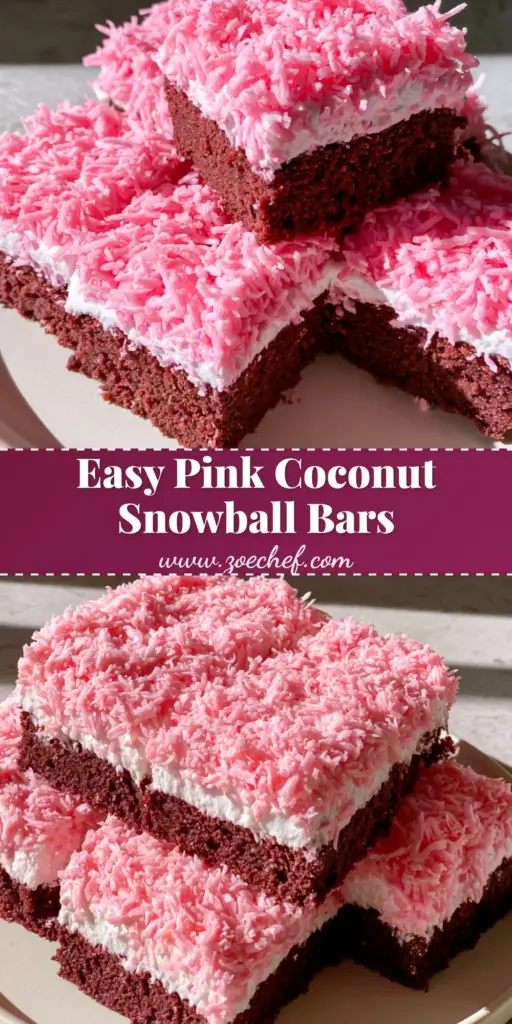
Pink Coconut Snowball Cake Bars are the ultimate nostalgic treat, reimagined into a sophisticated, handheld dessert that stops the scroll every single time. If you remember those classic marshmallow-filled snack cakes from your childhood, these bars take that iconic flavor profile and elevate it with a dense dark chocolate cake base and a cloud-like marshmallow frosting. The vibrant neon pink coconut flakes provide a stunning visual contrast that makes these bars a viral sensation on Pinterest.
Creating these Pink Coconut Snowball Cake Bars is surprisingly simple, yet the results look like they came from a high-end boutique bakery. Whether you are prepping for a birthday party, a holiday dessert spread, or just a weekend craving, the combination of rich cocoa and sweet coconut is unparalleled. These bars are designed to be thick, sturdy, and absolutely loaded with texture.
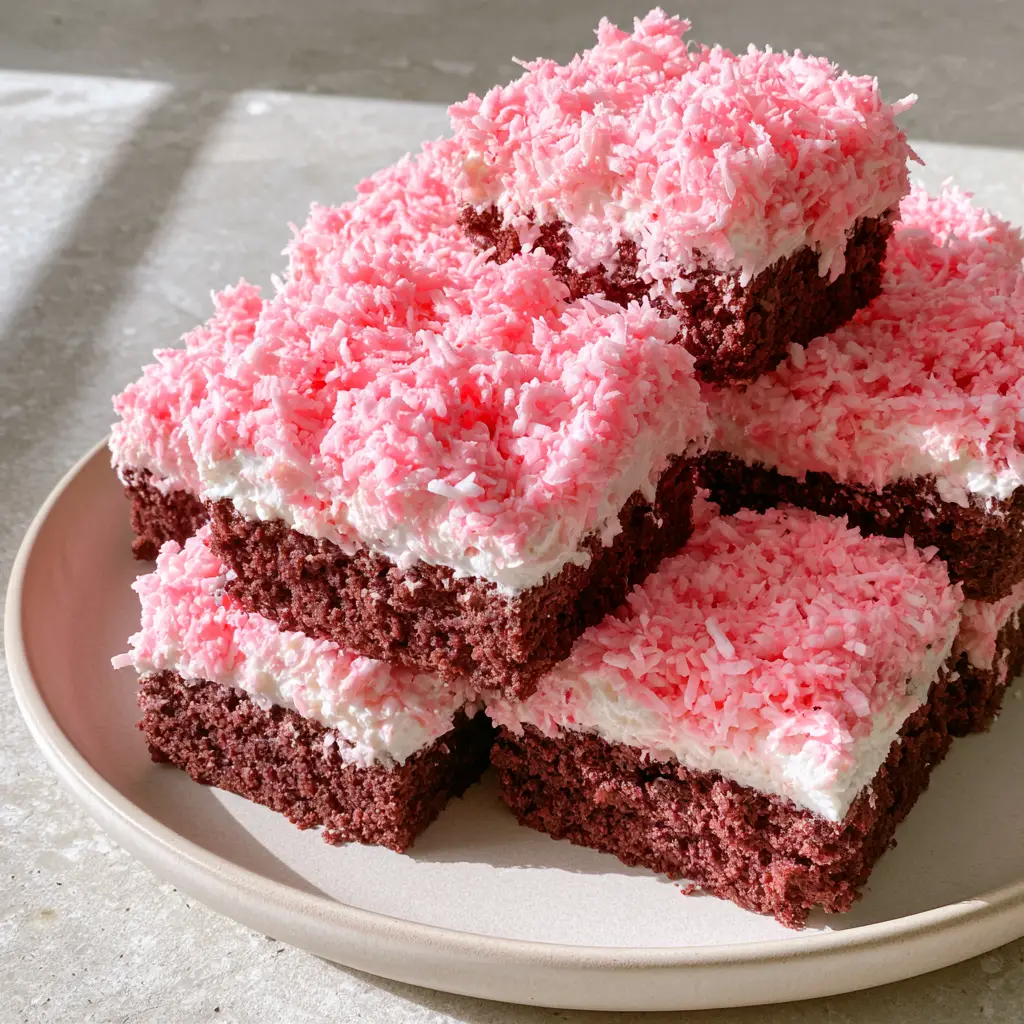
Why You Will Love These Vibrant Pink Coconut Snowball Cake Bars
- The Ultimate Texture Contrast: You get a fudgy, dense dark chocolate cake paired with a light, airy marshmallow topping and crunchy coconut flakes.
- Vibrant Pinterest-Ready Aesthetics: The neon pink coconut creates a striking visual that pops against the white frosting and dark cake.
- Make-Ahead Friendly: These bars actually taste better the next day once the flavors have had time to meld together perfectly.
- Crowd-Pleasing Flavors: It’s a sophisticated twist on a nostalgic classic that appeals to both kids and adults alike.
If you love the combination of fruit and chocolate, you might also want to try my strawberry cheesecake cookies for your next baking session!
Essential Ingredients for Success
To achieve the perfect Pink Coconut Snowball Cake Bars, you need ingredients that provide both structural integrity and deep flavor. Here is what you will need to gather:
The Dark Chocolate Base
- 1 ½ cups (190g) All-Purpose Flour: Provides the necessary structure for a dense, sliceable bar.
- ¾ cup (65g) Dutch-Processed Dark Cocoa Powder: This is crucial for that dense dark chocolate appearance and rich, bittersweet flavor.
- 1 ½ cups (300g) Granulated Sugar: Sweetens the base and helps create a tender crumb.
- 1 ½ tsp (7g) Baking Soda & 1 tsp (5g) Salt: The leavening agent and flavor enhancer to balance the chocolate.
- 2 Large Eggs: Bind the batter together for a fudgy consistency.
- ¾ cup (180ml) Whole Milk: Adds moisture and richness to the dark chocolate cake.
- 1/3 cup (80ml) Vegetable Oil: Ensures the cake stays moist for days.
- ¾ cup (180ml) Boiling Water: The secret step to “bloom” the cocoa for maximum chocolate intensity.
The Marshmallow Frosting & Pink Coconut
- 1 cup (225g) Unsalted Butter: Softened to room temperature for a creamy, stable frosting base.
- 1 jar (7oz/198g) Marshmallow Fluff: This gives the frosting its signature “snowball” taste and stretchy texture.
- 2 cups (240g) Powdered Sugar: Thickens the frosting so it can be applied in a thick white layer.
- 2 cups (150g) Sweetened Shredded Coconut: The canvas for our vibrant color.
- Neon Pink Gel Food Coloring: To achieve that specific vibrant pink hue mentioned in our visual blueprint.
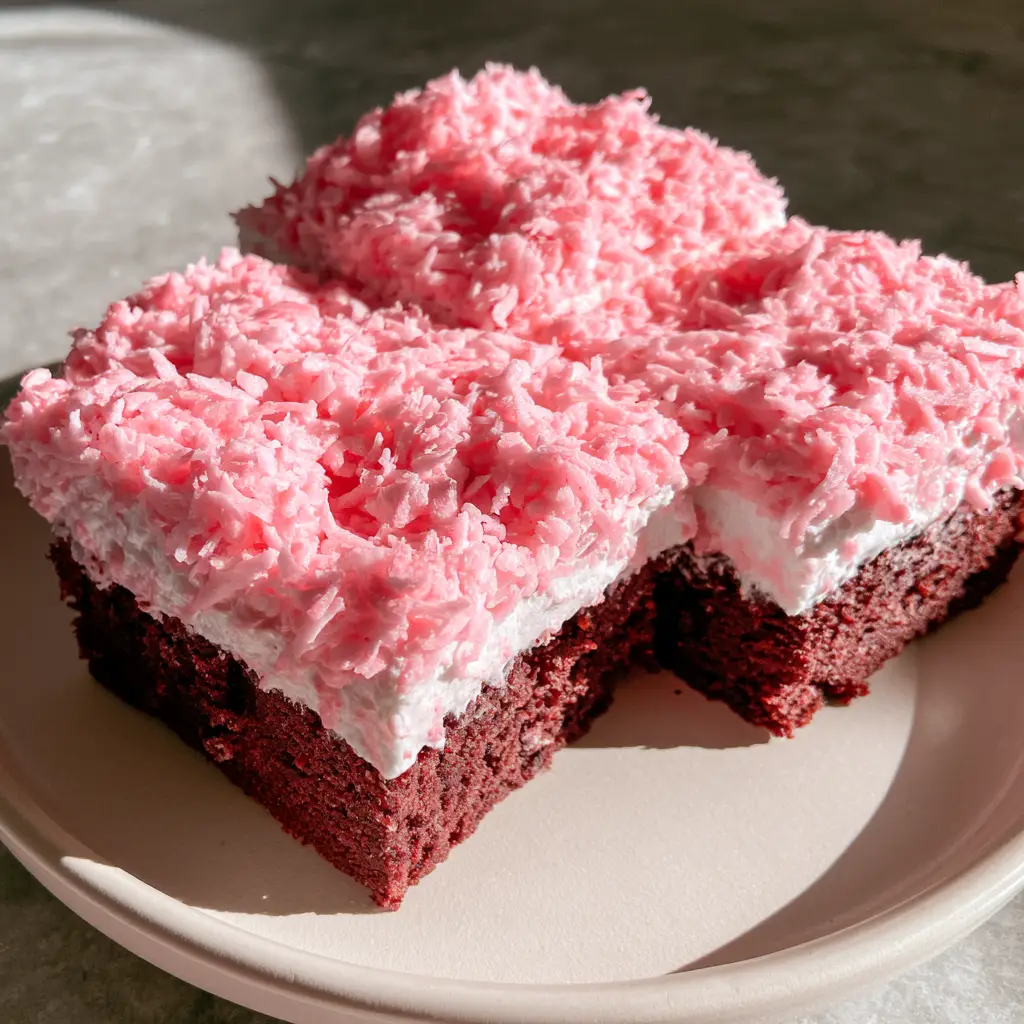
How to Make Pink Coconut Snowball Cake Bars Step-by-Step
Step 1: Prepare the Neon Pink Coconut Flakes
Before you even start the oven, let’s get the color right. Place your shredded coconut in a large zip-top bag. Add 2-3 drops of neon pink gel food coloring. Seal the bag and shake vigorously, massaging the color into the flakes until every piece is a vibrant neon pink. Spread the coconut on a parchment-lined tray to air dry while you bake.
Step 2: Bake the Dense Dark Chocolate Cake Base
Preheat your oven to 350°F (175°C) and grease a 9×13 inch baking pan. In a large bowl, whisk together the flour, cocoa, sugar, baking soda, and salt. Add the eggs, milk, and oil, mixing until smooth. Carefully stir in the boiling water—the batter will be thin, but this is what creates the moist dark chocolate texture. Pour into the pan and bake for 28-32 minutes. Let it cool completely before frosting.
While the cake cools, if you are looking for more fun dessert ideas, check out these apple pie egg rolls for a crispy, sweet treat!
Step 3: Whip the Thick White Marshmallow Frosting
In a stand mixer, beat the softened butter until pale and fluffy. Add the marshmallow fluff and continue to beat on medium-high speed. Gradually add the powdered sugar and a splash of vanilla. The goal is a uniform, thick spread of smooth white frosting that can hold the weight of the coconut flakes without sliding.
Step 4: Assembly and Finishing Touches
Once the chocolate base is stone cold, spread the marshmallow frosting in a thick, even layer from edge to edge. Immediately, while the frosting is still “tacky,” take your vibrant pink coconut flakes and press them heavily into the top. You want the surface to be heavily encrusted so no white frosting shows through.
Step 5: Slicing into Perfect Squares
For those clean, sharp edges seen in the Pink Coconut Snowball Cake Bars photos, chill the entire pan in the fridge for at least 60 minutes. Use a sharp, warm knife to slice the bars into perfect squares. Wipe the knife between every single cut to maintain the contrast between the dark cake and white frosting.
Expert Tips for the Best Coconut Bars
- Don’t Overbake: The chocolate base should be dense, not dry. A toothpick should come out with a few moist crumbs attached.
- Use Gel Coloring: Liquid food coloring can make the coconut soggy. Gel provides a vibrant neon look without changing the texture.
- Cold is Key: Never frost a warm cake, or your marshmallow frosting will melt into a puddle.
- Press the Coconut: Don’t just sprinkle; gently press the coconut into the frosting to ensure it stays put when you take a bite.
For another great handheld treat, you can’t go wrong with my peppermint sugar cookie bars during the festive season.
Storage and Freezing Instructions
Keep your Pink Coconut Snowball Cake Bars in an airtight container at room temperature for up to 2 days, or in the refrigerator for up to 5 days. Because of the marshmallow content, they stay remarkably soft when chilled.
To freeze, place the sliced squares on a baking sheet to flash-freeze for one hour, then wrap individually in plastic wrap and store in a freezer bag for up to 3 months. Thaw in the fridge before serving.
What to Serve with Dessert Bars
These bars are incredibly rich, so they pair beautifully with a cold glass of milk or a hot cup of black coffee. If you’re hosting a party, serve them alongside a lighter fruit-based dessert like my cream cheese lemonade pie to offer your guests a variety of flavors and textures.
Frequently Asked Questions
Absolutely! Substitute the all-purpose flour for a high-quality 1:1 gluten-free flour blend. The density of the chocolate cake makes it very forgiving for gluten-free adaptations.
Yes, you can use natural cocoa powder, but the base will be lighter in color and slightly less rich. Dutch-processed dark cocoa is recommended for the signature ‘snowball’ contrast.
Yes, the addition of butter and powdered sugar to the marshmallow fluff creates a stable buttercream that holds its shape, though chilling the bars makes for cleaner slices.
The secret is using neon pink gel food coloring rather than liquid drops. Shake the coconut in a sealed bag with the gel to ensure even, bright coverage without making the coconut wet.
The Ultimate Pink Coconut Snowball Cake Bars Recipe
Pink Coconut Snowball Cake Bars with Dark Chocolate
Ingredients
Equipment
Method
- Place shredded coconut in a zip-top bag with neon pink gel coloring. Shake until the coconut is a vibrant, uniform pink. Set aside.
- Whisk flour, cocoa, sugar, baking soda, and salt in a large bowl.
- Mix in eggs, milk, and oil until combined. Stir in boiling water by hand until smooth.
- Pour into a prepared 9x13 pan and bake at 350°F (175°C) for 30 minutes. Cool completely.
- Beat butter and marshmallow fluff together. Gradually add powdered sugar until thick and smooth.
- Spread a thick layer of frosting over the cooled cake. Press the pink coconut heavily into the frosting.
- Refrigerate for 1 hour, then slice into perfect squares.
Notes
Ensure the boiling water is added last to bloom the cocoa for deeper flavor.
Join the Community!
Did you make these Pink Coconut Snowball Cake Bars? I want to see your vibrant creations! Save this recipe to your favorite Pinterest dessert board so you never lose it. Follow zoe_chef_Official for more viral-worthy treats, and don’t forget to leave a 5-star rating below. If you snapped a photo of your perfect chocolate squares, share it in the comments!