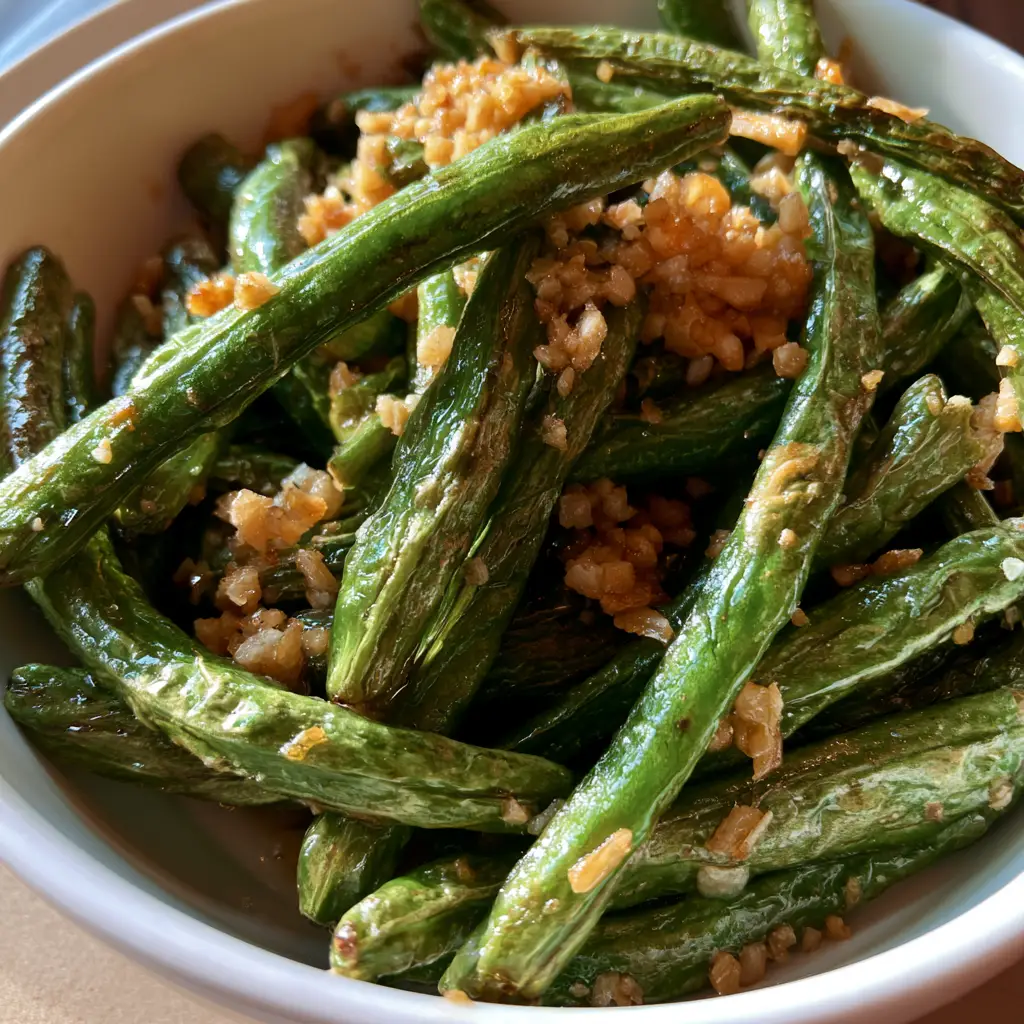
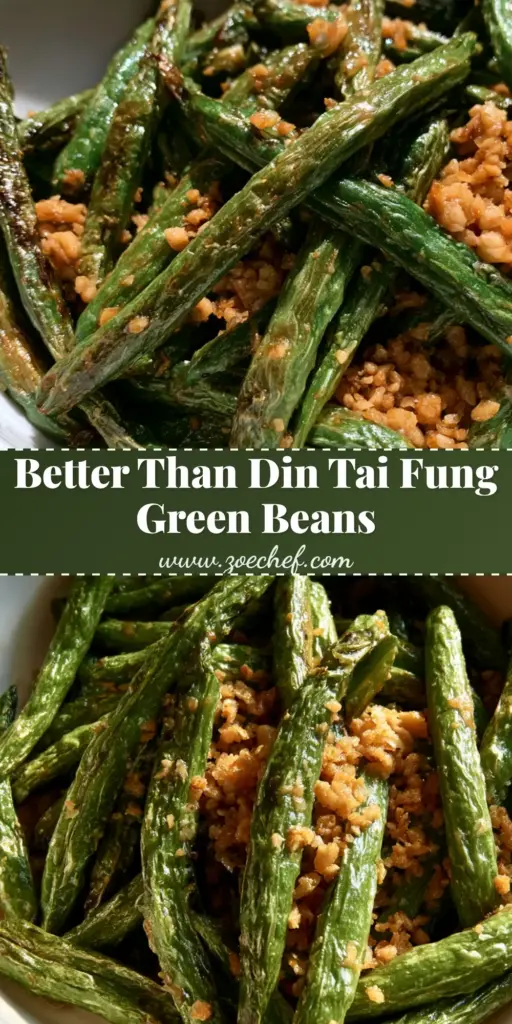
If you have ever wondered how high-end restaurants achieve those perfectly Blistered Garlic Green Beans with wrinkled skins and smoky charred edges, you are in the right place. There is something incredibly addictive about the snap of a fresh green bean paired with the deep, savory umami of a glossy soy-based sauce and the crunch of golden fried garlic.
This Blistered Garlic Green Beans recipe isn’t just a side dish; it’s a masterclass in high-heat cooking. We are skipping the soggy, boiled beans of the past and embracing a technique that creates maximum texture and flavor in under 15 minutes.
Pinterest foodies are obsessed with this dish because it looks just as good as it tastes. The Visual Recipe Blueprint for this dish is all about those wrinkled bean skins and charred edges that signal a perfect sear. When you top them with minced fried garlic, you create a handheld-photo-worthy meal that will stop anyone’s scroll.
Why You Will Crave These Blistered Green Beans
- Unbeatable Texture: We achieve a specific wrinkled skin through high-heat searing that holds onto the sauce perfectly.
- Garlic Lover’s Dream: We use a generous amount of minced fried garlic to provide a nutty, crunchy contrast to the tender beans.
- Glossy Umami Glaze: A glossy soy-based sauce coats every inch, ensuring no bean is left unseasoned.
- Quick & Professional: Get restaurant-quality results in your home kitchen using simple, accessible ingredients.
If you love big garlic flavors, you should also check out my garlic butter pasta for another weeknight staple that never fails to impress.
Essential Ingredients for Success
To get that authentic look and taste, every ingredient in these Blistered Garlic Green Beans serves a specific culinary purpose. Don’t skip the prep!
Fresh Green Beans (1 lb / 454g): You want long, slender beans. Chinese long beans work beautifully, but standard string beans are perfect as long as they are fresh and snappy.
Neutral Oil (3 tbsp / 45ml): Use an oil with a high smoke point like avocado, canola, or grapeseed. We need the pan screaming hot to get those charred edges.
Fresh Garlic (8 cloves): We are using a lot of garlic here. Half will be fried until golden brown for texture, and the other half will meld into the sauce.
Soy Sauce (1.5 tbsp / 22ml): This provides the base for our glossy soy-based sauce. Use tamari for a gluten-free version.
Toasted Sesame Oil (1 tsp / 5ml): This adds that signature nutty aroma that defines great Asian-inspired side dishes.
Sugar or Honey (1 tsp / 5g): Just a touch of sweetness to balance the salt and help the sauce caramelize onto the wrinkled bean skins.
Kosher Salt (to taste): Even with soy sauce, a pinch of salt during the searing phase helps draw out moisture for better blistering.
How to Master the High-Heat Sear
The secret to Blistered Garlic Green Beans is not “cooking” them in the traditional sense, but rather “blistering” them. Follow these steps for the perfect result.
Step 1: Prep and Dry Your Beans
Wash your beans and trim the ends. CRITICAL TIP: You must dry the beans completely with a kitchen towel. Water is the enemy of the sear. If they are wet, they will steam instead of blister.
Step 2: The Golden Garlic Crunch
Heat 1 tbsp (15ml) of oil over medium-low heat. Add half of your minced garlic. Fry until it turns golden-brown and fragrant. Remove the garlic with a slotted spoon and set aside. This ensures the garlic stays crunchy and doesn’t burn during the high-heat bean sear.
Step 3: Searing for Wrinkled Skins
Turn the heat up to high. Add the remaining 2 tbsp (30ml) of oil. Once the oil is shimmering, add the green beans in a single layer. Do not crowd the pan; work in batches if necessary.
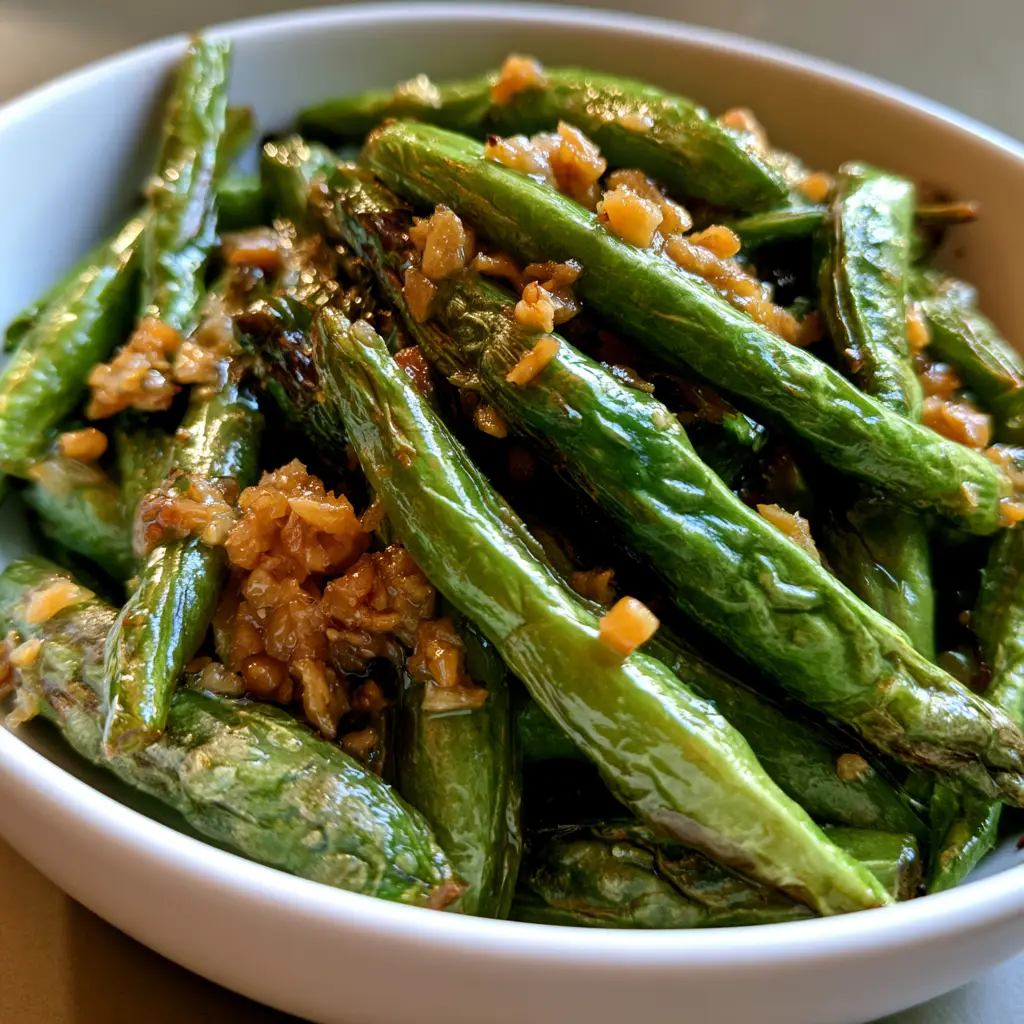
Let the beans sit undisturbed for 2-3 minutes. You want to hear that aggressive sizzle. This is where the charred edges and wrinkled bean skins are formed. Toss and repeat until the beans are tender-crisp and look beautifully blistered.
Step 4: The Glossy Sauce Finish
Whisk the soy sauce, sesame oil, and sugar in a small bowl. Lower the heat to medium and add the remaining raw garlic to the pan for 30 seconds. Pour the sauce over the beans.
Toss rapidly. The sauce will bubble and thicken instantly, creating a glossy soy-based sauce that clings to every wrinkle. Fold in half of your reserved minced fried garlic.
For a complete meal, try pairing these beans with my garlic parmesan chicken and rice. It’s a flavor combination that hits all the right notes!
Expert Tips for the Best Blistered Green Beans
- Use a Wok or Cast Iron: These materials retain heat the best, which is essential for getting those charred edges without overcooking the interior of the bean.
- Don’t Overcook: The beans should be wrinkled on the outside but still have a slight “snap” when you bite into them. Mushy beans are a no-go.
- The Sugar Factor: Don’t skip the tiny bit of sugar. It’s the secret to getting that glossy, restaurant-style sheen that makes the dish look so professional.
- Fresh is Best: Frozen green beans contain too much internal moisture to truly blister. Stick to fresh produce for this specific recipe.
Storage and Reheating Instructions
To Store: Keep your leftover Blistered Garlic Green Beans in an airtight container in the refrigerator for up to 3 days.
To Reheat: For the best results, avoid the microwave. Reheat them in a hot skillet with a tiny splash of water or oil for 1-2 minutes. This helps maintain the texture of the wrinkled bean skins.
Freezing: I do not recommend freezing this dish, as the beans will lose their signature crunch and become soft upon thawing.
What to Serve with Blistered Garlic Green Beans
These beans are incredibly versatile. They shine next to a variety of proteins and grains. Here are a few favorites:
- Asian-Style Salmon: The soy glaze matches perfectly with grilled fish.
- Steamed Rice: A bowl of jasmine rice is the perfect vessel for soaking up extra glossy soy-based sauce.
- Hearty Pastas: Surprisingly, these beans make a great side for creamy garlic parmesan orzo.
- Tacos: For a fusion twist, serve them alongside chicken street tacos.
Frequently Asked Questions
It is not recommended. Frozen green beans contain too much moisture, which causes them to steam rather than blister, resulting in a soggy texture instead of the signature wrinkled skin.
The secret is high heat and completely dry beans. Use a neutral oil with a high smoke point and let the beans sit undisturbed in a hot skillet for a few minutes to develop charred edges.
This recipe uses a two-step garlic process. We fry half the garlic early at a lower temperature until golden, then add the rest at the very end to ensure maximum flavor without bitterness.
It can be! Simply substitute the soy sauce with Tamari or coconut aminos to make these blistered garlic green beans completely gluten-free.
Chinese green beans, or long beans, are thinner and longer than traditional string beans. They have a denser texture that stands up exceptionally well to high-heat searing.
The Ultimate Blistered Garlic Green Beans Recipe
Blistered Garlic Green Beans: The Ultimate Restaurant-Style Recipe
Ingredients
Equipment
Method
- Ensure green beans are washed and bone-dry to achieve the best blistered effect.
- Heat 1 tbsp (15ml) oil over medium-low. Fry half the minced garlic until golden-brown. Remove and set aside.
- Add remaining oil and heat until smoking. Add beans and sear for 3-5 minutes until wrinkled and charred.
- Whisk sauce ingredients, add remaining raw garlic to pan, then pour sauce over beans. Toss until glossy and coated.
Notes
Make sure the beans are completely dry before adding them to the hot oil to avoid steaming.
Join the Community!
I can’t wait to see your recreations of these Blistered Garlic Green Beans! This dish is a total game-changer for weeknight dinners. If you make it, please save this recipe to your Pinterest boards so you never lose it!
Don’t forget to follow zoe_chef_Official for more restaurant-style recipes made easy. If you loved the crunch of that fried garlic, leave a 5-star rating below and upload a photo of your dish in the comments. Happy cooking!